

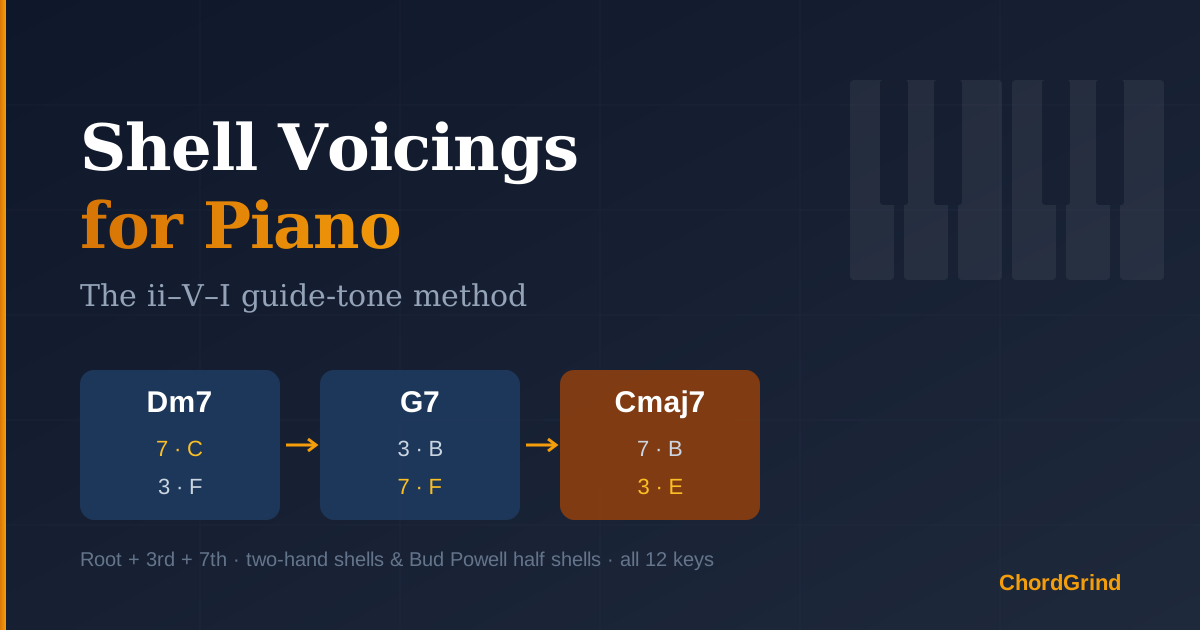
A shell voicing plays only three notes of a 7th chord: the root, the 3rd and the 7th. That's it — no 5th, no extensions. It sounds thin on paper, yet it's how pianists from Bud Powell onwards comp through bebop tunes, and it's the fastest way to make any lead sheet playable. This guide explains why shells work, how the notes move through a ii–V–I, and how to drill them in every key with ChordGrind's free Shell Voicing ii–V–I Trainer.
Table of Contents
- What Is a Shell Voicing?
- Why Do the 3rd and 7th Matter So Much?
- How Do Guide Tones Move Through a ii–V–I?
- Two-Hand Shells vs. Half Shells (Bud Powell Voicings)
- How to Use the Shell Voicing Trainer
- A 7-Day Practice Plan
- Common Mistakes
- FAQ
What Is a Shell Voicing?
A shell voicing is a 7th chord reduced to the three notes that define it. For Dm7 that's D (root), F (3rd) and C (7th). For G7 it's G, B and F. For Cmaj7 it's C, E and B.
The 5th is left out because it adds almost nothing: it's the same perfect 5th in major 7, dominant 7 and minor 7 chords, so it doesn't tell the ear which chord you're playing. Extensions (9ths, 13ths) are colour you add later. The shell is the skeleton every richer voicing grows from — including rootless voicings, which simply drop the root and add colour tones on top.
Why Do the 3rd and 7th Matter So Much?
The 3rd decides major or minor. The 7th decides major 7, dominant 7 or minor 7. Together they are the chord's identity, which is why jazz players call them guide tones.
| Chord | 3rd | 7th | What the pair tells you |
|---|---|---|---|
| Dm7 | F (minor 3rd) | C (minor 7th) | minor 7 |
| G7 | B (major 3rd) | F (minor 7th) | dominant 7 |
| Cmaj7 | E (major 3rd) | B (major 7th) | major 7 |
If a bass player is covering the roots, two notes — the 3rd and the 7th — are enough for a band to hear every chord change clearly.
How Do Guide Tones Move Through a ii–V–I?
Here is the part that makes shells so efficient. Through a ii–V–I, the guide tones barely move:
- The 7th falls a half step and becomes the next chord's 3rd (C in Dm7 → B in G7; F in G7 → E in Cmaj7).
- The 3rd stays put and becomes the next chord's 7th (F in Dm7 stays F in G7; B in G7 stays B in Cmaj7).
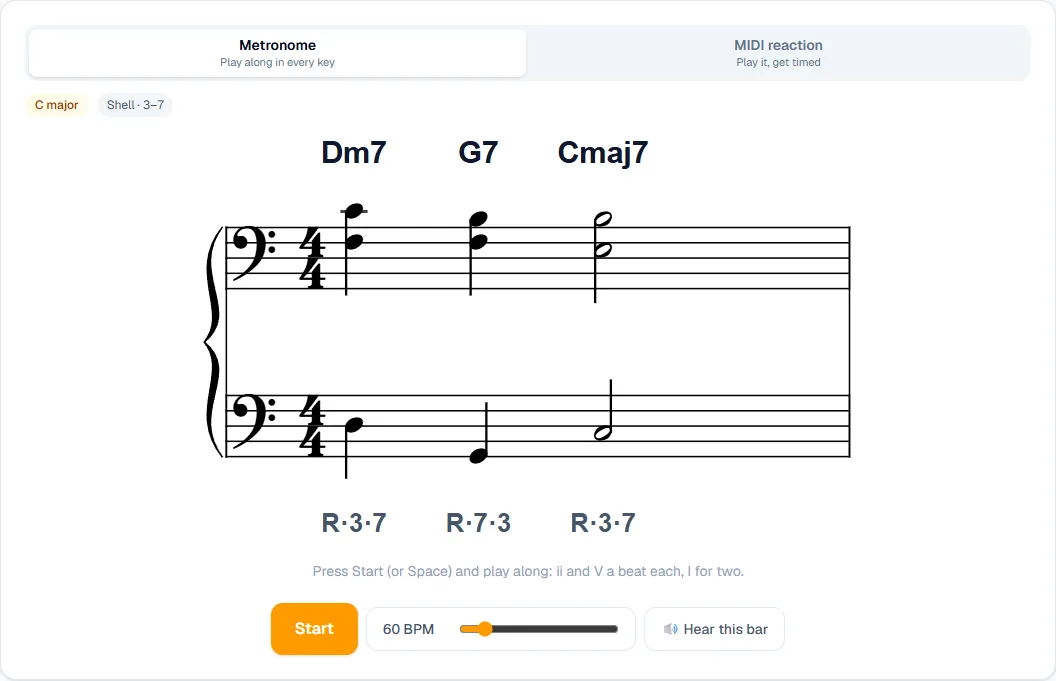
So your right hand moves one finger by one half step per chord change. The two guide tones swap roles each time, which is why there are two ways to start: with the 3rd on the bottom (3–7) or with the 7th on the bottom (7–3). Learn both and you can play the progression in any register without jumping.
Two-Hand Shells vs. Half Shells (Bud Powell Voicings)
There are two common ways to play shells:
- Two-hand shells — left hand plays the root, right hand plays the 3rd and 7th. Full and clear; good for solo piano and for learning the guide-tone motion.
- Half shells, often called Bud Powell voicings — the left hand alone plays the root plus one guide tone (root + 7th or root + 3rd). That frees the right hand to play the melody or improvise, exactly how bebop pianists comped for themselves.
Half shells alternate too: start Dm7 with root + 7th, then G7 with root + 3rd, then Cmaj7 with root + 7th. Or start with root + 3rd and alternate the other way.
How to Use the Shell Voicing Trainer
Open the Shell Voicing ii–V–I Trainer. Everything runs in your browser — no sign-up.
- Pick your voicings. Choose any of the four: Shell · 3–7, Shell · 7–3, Half shell · R–7 and Half shell · R–3. You can select several; each key is played in every selected voicing before moving on, so you can compare 3–7 and 7–3 back to back.
- Choose a start key and order. The start key defaults to today's key from your practice plan. Then pick Up in 4ths (C F B♭ E♭…), Down in whole steps (C B♭ A♭ G♭…) or Stay in one key.
- Turn on R / 3 / 7 labels while you learn. They mark every note's role under the staff, so you can see the 3rd and 7th trade places. Switch them off once the shapes are in your hands.
- Play along in Metronome mode. One bar per key after a bar of count-in: ii and V get a beat each, I gets two. Start slow (the tempo slider goes from 40 to 200 BPM) and press Hear this bar any time to check the sound.
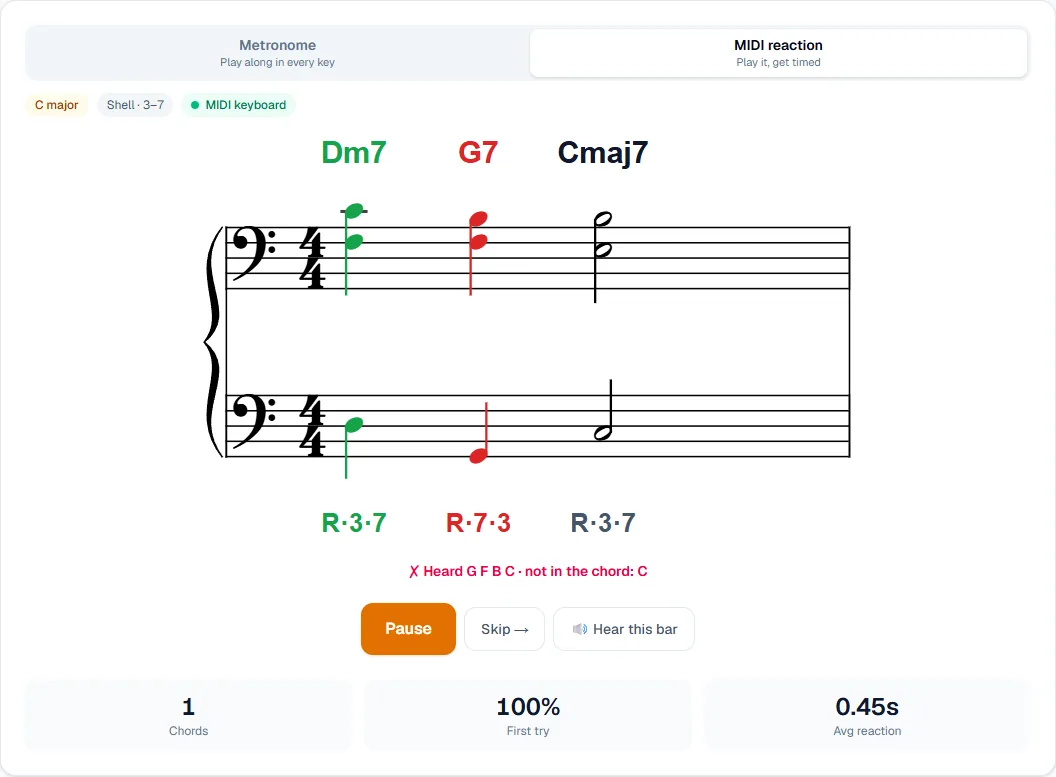
- Get checked in MIDI reaction mode. Connect a MIDI keyboard (desktop Chrome or Edge) and the trainer judges each chord as you play it. Note names are what count — any octave, either hand — but the lowest key must be the root. A chord turns green when it's right; a wrong note turns it red and tells you which note doesn't belong. Keep playing until it's right.
- Read your weak spots. Below the trainer, a heatmap shows first-try accuracy and average reaction time for every key × ii / V / I. The Dashboard charts all 12 keys side by side, so the keys you avoid stop hiding.
A 7-Day Practice Plan
Ten to fifteen minutes a day is plenty.
| Day | Voicing | Keys | Tempo / goal |
|---|---|---|---|
| 1 | Shell · 3–7 | Stay in C, then F | 60 BPM, labels on |
| 2 | Shell · 3–7 | Up in 4ths, all 12 | 60 BPM |
| 3 | Shell · 7–3 | Up in 4ths, all 12 | 60 BPM |
| 4 | Shell · 3–7 + 7–3 | Up in 4ths | 72 BPM, labels off |
| 5 | Half shell · R–7 | Down in whole steps | 60 BPM |
| 6 | Half shell · R–7 + R–3 | Down in whole steps | 72 BPM |
| 7 | Your two weakest keys from the heatmap | Stay in one key | MIDI mode, aim for first-try accuracy |
Common Mistakes
- Moving the whole hand. If your right hand jumps between chords, you've lost the guide-tone line. Only one note should move, by a half step.
- Skipping the 7–3 starting position. Players often learn only one shape and get stuck when the melody sits in the other register.
- Practising only in C and F. The point of shells is to play any tune in any key. Use Up in 4ths so every key gets equal time.
- Rushing the tempo. Fluency beats speed. Raise the BPM only when you can play a full cycle without hesitating.
FAQ
Are shell voicings only for jazz?
No. They come from jazz, but any style that uses 7th chords — soul, gospel, R&B, pop ballads — benefits from a clean root + 3rd + 7th left hand. They're also the quickest way to sight-read a chord chart on keyboard.
What is the difference between shell voicings and rootless voicings?
Shells keep the root and drop the 5th; rootless voicings drop the root and add colour tones such as the 9th or 13th around the same 3rd and 7th. Learn shells first: rootless voicings are built on the same guide-tone movement. You can drill rootless A and B voicings once shells feel automatic.
Do I need a MIDI keyboard?
No. Metronome mode works with any piano — play along and listen. A MIDI keyboard adds automatic checking and per-key reaction times.
How long until I can play shells in all 12 keys?
With ten minutes a day, most players can cycle a ii–V–I through all 12 keys in both 3–7 and 7–3 positions within two to three weeks.
Start Practising
Shell voicings are the most useful hour you can spend on jazz harmony: three notes, one moving finger, every tune in every key. Open the free Shell Voicing ii–V–I Trainer, start in today's key, and let the guide tones do the work. When the shells are solid, move on to chord drills in every inversion and rootless voicings.